Levels
Digital Photography is more than just using a digital
camera; it also entails some post processing
in an image editing software to the image you
captured with your digital camera. And it is
often not as complicated as you might think
it is -- or as some make it to be. In this tutorial,
we look at "Levels" and cover the basics of
what you need to know about adjusting levels
in Photoshop Elements. It's a simple 3-step
process that takes barely a minute to perform
but that can help you bring back to life pictures
you thought forever ruined.
Adjusting Levels
You've read the notes that accompany some pictures: " Some adjustments to levels peformed " and have probably been mystified as to what exactly that entailed.
Adjusting levels is a 3-step process:
- Adjust for the shadows;
- Adjust for the highlights; and,
- Adjust for the midtones.
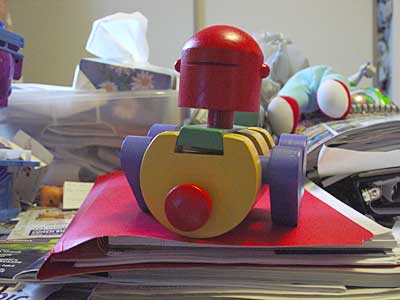
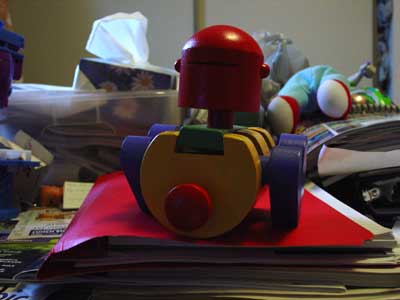
Let's look at a picture that seems "ruined," in this case, it seems under exposed, i.e. too dark:
If, in the past, you have just thrown up your hands in the air and bemoaned how bad your digital camera was, perhaps you were a bit too hasty. We will recover this picture using our 3-step levels adjustment process.
[If you want to follow along with this tutorial, download the above picture now and open it in Photoshop Elements.]
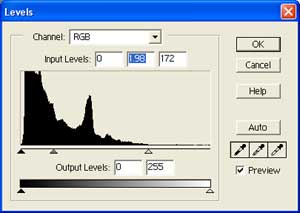
In Photoshop Elements, select Enhance - Brightness/Contrast - Levels... A histogram pops up on your screen and looks like this:
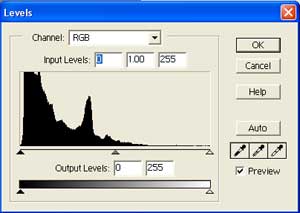
Don't panic! The histogram is simply a representation of all the pixels in the picture. A quick glance at it tells us that most of our pixels are toward the shadows (to the left). Along the horizontal axis, there are 3 triangular markers (really, sliders): use the black one at the left to indicate where the darkest group of pixels start in your picture; use the white one at the right to indicate where the brightest group of pixels start in your picture; and use the shaded one in the middle to indicate the midtones. It's that simple!
Let's apply our 3 steps:
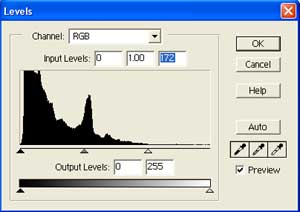
1. Adjust for the shadows. We want to move the black marker to the first group of dark pixels. In this case, since the black marker is already pointing to the first group of dark pixels, we will leave it where it is, i.e. at the 0 mark.
2. Adjust for the highlights. We want to move the white marker to the first group of bright pixels. In this case, we move the white marker to the left to a point where we feel the first bright group of pixels start, around the 172 mark:
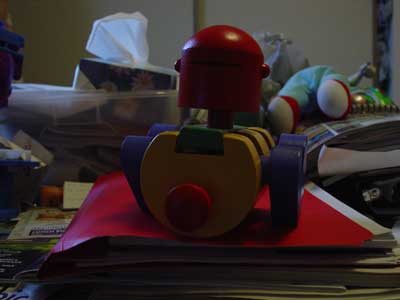
By doing this, notice how the picture has changed already for the better, with "true" highlights:
3. Adjust for the midtones. Click on the shaded marker and drag it to the left or right until you are satisfied with the result, in our case to somewhere around 1.98 (adjust to your own personal preference):
Click OK and save your "restored" picture. Nothing wrong with this picture now -- expect for the clutter on my desk, that is!

There, that was easy, eh? Get into the habit of bringing your picture into levels and adjusting it for shadows, highlights, and midtones before you apply sharpening to it (another easy process):